13 KiB
| title | date | description | featured | toc | comment | series | tags | |||||||||||
|---|---|---|---|---|---|---|---|---|---|---|---|---|---|---|---|---|---|---|
| Easy Push Notifications With ntfy.sh | 2023-09-17 | Deploying and configuring a self-hosted pub-sub notification handler, getting another server to send a notifcation when it boots, and integrating the notification handler into Home Assistant. | false | true | true | Projects |
|
The Pitch
Wouldn't it be great if there was a simple way to send a notification to your phone(s) with just a curl call? Then you could get notified when a script completes, a server reboots, a user logs in to a system, or a sensor connected to Home Assistant changes state. How great would that be??
ntfy.sh (pronounced notify) provides just that. It's an open-source, easy-to-use, HTTP-based notification service, and it can notify using mobile apps for Android (Play or F-Droid) or iOS (App Store) or a web app.
I thought it sounded pretty compelling - and then I noticed that ntfy's docs made it sound really easy to self-host the server component, which would give me a bit more control and peace of mind.
{{% notice note "Topics are public" %}} Ntfy leverages uses a pub-sub approach, and (by default) all topics are public. This means that anyone can write to or read from any topic, which makes it important to use a topic name that others aren't likely to guess.
Self-hosting lets you define ACLs to protect sensitive topics. {{% /notice %}}
So let's take it for a spin!
The Setup
I'm going to use the Docker setup on a small cloud server and use Caddy as a reverse proxy. I'll also configure ntfy to require authentication so that randos (hi!) won't be able to harass me with notifications.
Ntfy in Docker
So I'll start by creating a new directory at /opt/ntfy/ to hold the goods, and create a compose config.
sudo mkdir -p /opt/ntfy
sudo vim /opt/ntfy/docker-compose.yml
# /opt/ntfy/docker-compose.yml
version: "2.3"

services:
  ntfy:
    image: binwiederhier/ntfy
    container_name: ntfy
    command:
      - serve
    environment:
      - TZ=UTC    # optional: set desired timezone
    volumes:
      - ./cache/ntfy:/var/cache/ntfy
      - ./etc/ntfy:/etc/ntfy
      - ./lib/ntf:/var/lib/ntfy
    ports:
      - 2586:80
    healthcheck: # optional: remember to adapt the host:port to your environment
        test: ["CMD-SHELL", "wget -q --tries=1 http://localhost:8080/v1/health -O - | grep -Eo '\"healthy\"\\s*:\\s*true' || exit 1"]
        interval: 60s
        timeout: 10s
        retries: 3
        start_period: 40s
    restart: unless-stopped
This config will create/mount folders in the working directory to store the ntfy cache and config. It also maps localhost:2586 to port 80 on the container, and enables a simple healthcheck against the ntfy health API endpoint. This will ensure that the container will be automatically restarted if it stops working.
I can go ahead and bring it up:
sudo docker-compose up -d
Creating network "ntfy_default" with the default driver
Pulling ntfy (binwiederhier/ntfy:)...
latest: Pulling from binwiederhier/ntfy
7264a8db6415: Pull complete
1ac6a3b2d03b: Pull complete
Digest: sha256:da08556da89a3f7317557fd39cf302c6e4691b4f8ce3a68aa7be86c4141e11c8
Status: Downloaded newer image for binwiederhier/ntfy:latest
Creating ntfy ... done
Caddy Reverse Proxy
I'll also want to add the following to my Caddy config:
# /etc/caddy/Caddyfile
ntfy.runtimeterror.dev, http://ntfy.runtimeterror.dev {
  reverse_proxy localhost:2586

  # Redirect HTTP to HTTPS, but only for GET topic addresses, since we want
  # it to work with curl without the annoying https:// prefix
  @httpget {
    protocol http
    method GET
    path_regexp ^/([-_a-z0-9]{0,64}$|docs/|static/)
  }
  redir @httpget https://{host}{uri}
}
And I'll restart Caddy to apply the config:
sudo systemctl restart caddy
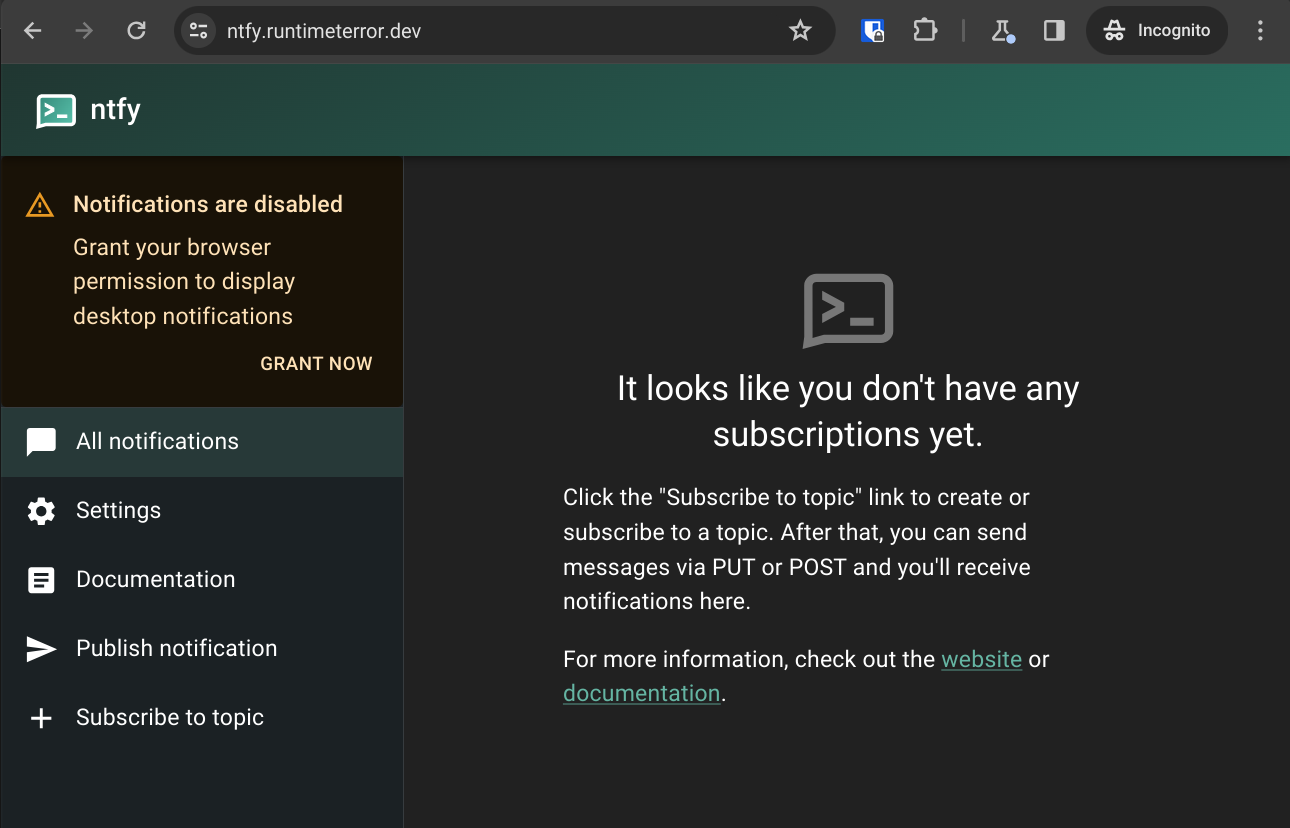
Now I can point my browser to https://ntfy.runtimeterror.dev and see the web interface:
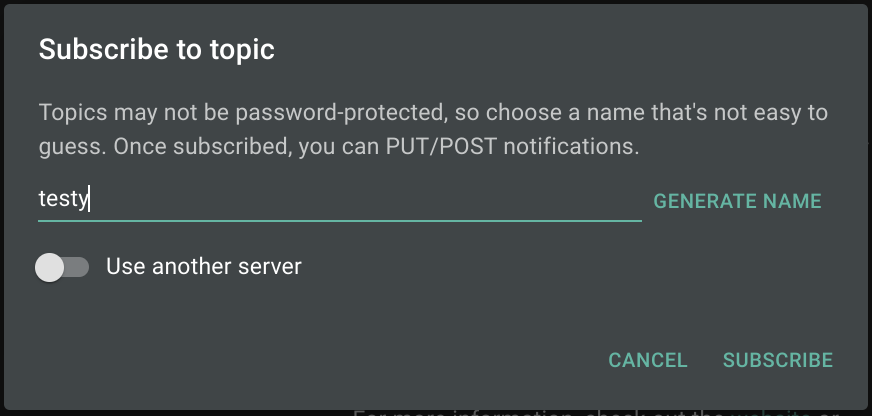
I can subscribe to a new topic:
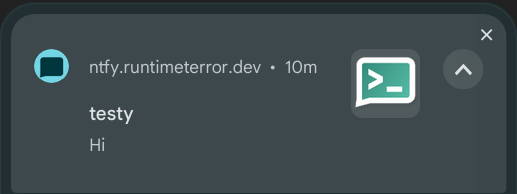
And publish a message to it:
curl -d "Hi" https://ntfy.runtimeterror.dev/testy
{"id":"80bUl6cKwgBP","time":1694981305,"expires":1695024505,"event":"message","topic":"testy","message":"Hi"}
Which will then show up as a notification in my browser:
Post-deploy Configuration
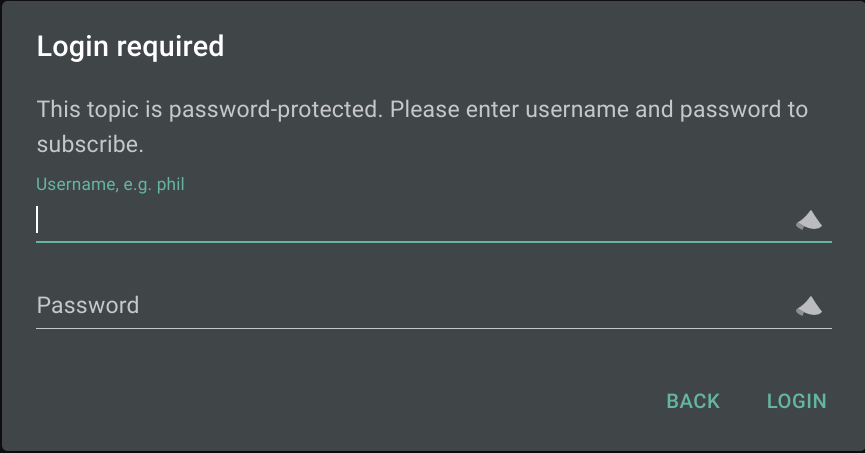
So now I've got my own ntfy server, and I've verified that it works for unauthenticated notifications. I don't really want to operate anything on the internet without requiring authentication, though, so I'm going to configure ntfy to prevent unauthenticated reads and writes.
I'll start by creating a server.yml config file which will be mounted into the container. This config will specify where to store the user database and switch the default ACL to deny-all:
# /opt/ntfy/etc/ntfy/server.yml
auth-file: "/var/lib/ntfy/user.db"
auth-default-access: "deny-all"
base-url: "https://ntfy.runtimeterror.dev"
I can then restart the container, and try again to subscribe to the same (or any other topic):
sudo docker-compose down && sudo docker-compose up -d
Now I get prompted to log in:
I'll need to use the ntfy CLI to create/manage entries in the user DB, and that means first grabbing a shell inside the container:
sudo docker exec -it ntfy /bin/sh
For now, I'm going to create three users: one as an administrator, one as a "writer", and one as a "reader". I'll be prompted for a password for each:
ntfy user add --role=admin administrator
user administrator added with role admin
ntfy user add writer
user writer added with role user
ntfy user add reader
user reader added with role user
The admin user has global read+write access, but right now the other two can't do anything. Let's make it so that writer can write to all topics, and reader can read from all topics:
ntfy access writer '*' write
ntfy access reader '*' read
I could lock these down further by selecting specific topic names instead of '*' but this will do fine for now.
Let's go ahead and verify the access as well:
ntfy access
user administrator (role: admin, tier: none)
- read-write access to all topics (admin role)
user reader (role: user, tier: none)
- read-only access to topic *
user writer (role: user, tier: none)
- write-only access to topic *
user * (role: anonymous, tier: none)
- no topic-specific permissions
- no access to any (other) topics (server config)
While I'm at it, I also want to configure an access token to be used with the writer account. I'll be able to use that instead of username+password when publishing messages.
ntfy token add writer
token tk_mm8o6cwxmox11wrnh8miehtivxk7m created for user writer, never expires
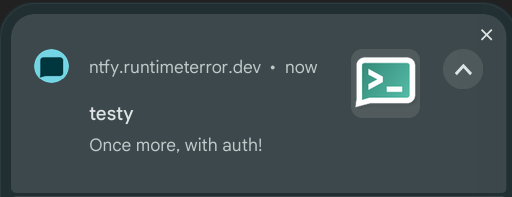
I can go back to the web, subscribe to the testy topic again using the reader credentials, and then test sending an authenticated notification with curl:
curl -H "Authorization: Bearer tk_mm8o6cwxmox11wrnh8miehtivxk7m" \
    -d "Once more, with auth!" \
    https://ntfy.runtimeterror.dev/testy
{"id":"0dmX9emtehHe","time":1694987274,"expires":1695030474,"event":"message","topic":"testy","message":"Once more, with auth!"}
The Use Case
Pushing notifications from the command line is neat, but how can I use this to actually make my life easier? Let's knock out quick quick configurations for a couple of the use cases I pitched at the top of the post: alerting me when a server has booted, and handling Home Assistant notifications in a better way.
Notify on Boot
I'm sure there are a bunch of ways to get a Linux system to send a simple curl call on boot. I'm going to create a simple script that will be triggered by a systemd service definition.
Generic Push Script
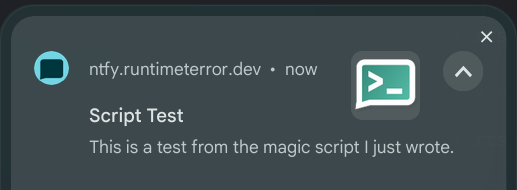
I may want to wind up having servers notify for a variety of conditions so I'll start with a generic script which will accept a notification title and message as arguments:
/usr/local/bin/ntfy_push.sh:
#!/usr/bin/env bash

curl \
  -H "Authorization: Bearer tk_mm8o6cwxmox11wrnh8miehtivxk7m" \
  -H "Title: $1" \
  -d "$2" \
  https://ntfy.runtimeterror.dev/server_alerts
Note that I'm using a new topic name now: server_alerts. Topics are automatically created when messages are posted to them. I just need to make sure to subscribe to the topic in the web UI (or mobile app) so that I can receive these notifications.
Okay, now let's make it executable and then give it a quick test:
chmod +x /usr/local/bin/ntfy_push.sh
/usr/local/bin/ntfy_push.sh "Script Test" "This is a test from the magic script I just wrote."
Wrapper for Specific Message
I don't know an easy way to tell a systemd service definition to pass arguments to a command, so I'll use a quick wrapper script to pass in the notification details:
/usr/local/bin/ntfy_boot_complete.sh:
#!/usr/bin/env bash

TITLE="$(hostname -s)"
MESSAGE="System boot complete"

/usr/local/bin/ntfy_push.sh "$TITLE" "$MESSAGE"
And this one should be executable as well:
chmod +x /usr/local/bin/ntfy_boot_complete.sh
Service Definition
Finally I can create and register the service definition so that the script will run at each system boot.
/etc/systemd/system/ntfy_boot_complete.service:
[Unit]
After=network.target

[Service]
ExecStart=/usr/local/bin/ntfy_boot_complete.sh

[Install]
WantedBy=default.target
sudo systemctl daemon-reload
sudo systemctl enable --now ntfy_boot_complete.service
And I can test it by rebooting my server. I should get a push notification shortly...
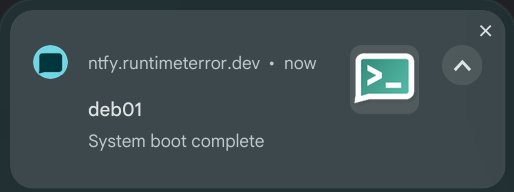
Nice! Now I won't have to continually ping a server to see if it's finished rebooting yet.
Home Assistant
I've been using Home Assistant for years, but have never been completely happy with the notifications built into the mobile app. Each instance of the app registers itself as a different notification endpoint, and it can become kind of cumbersome to keep those updated in the Home Assistant configuration.
Enabling ntfy as a notification handler is pretty straight-forward, and it will allow me to receive alerts on all my various devices without even needing to have the Home Assistant app installed.
Notify Configuration
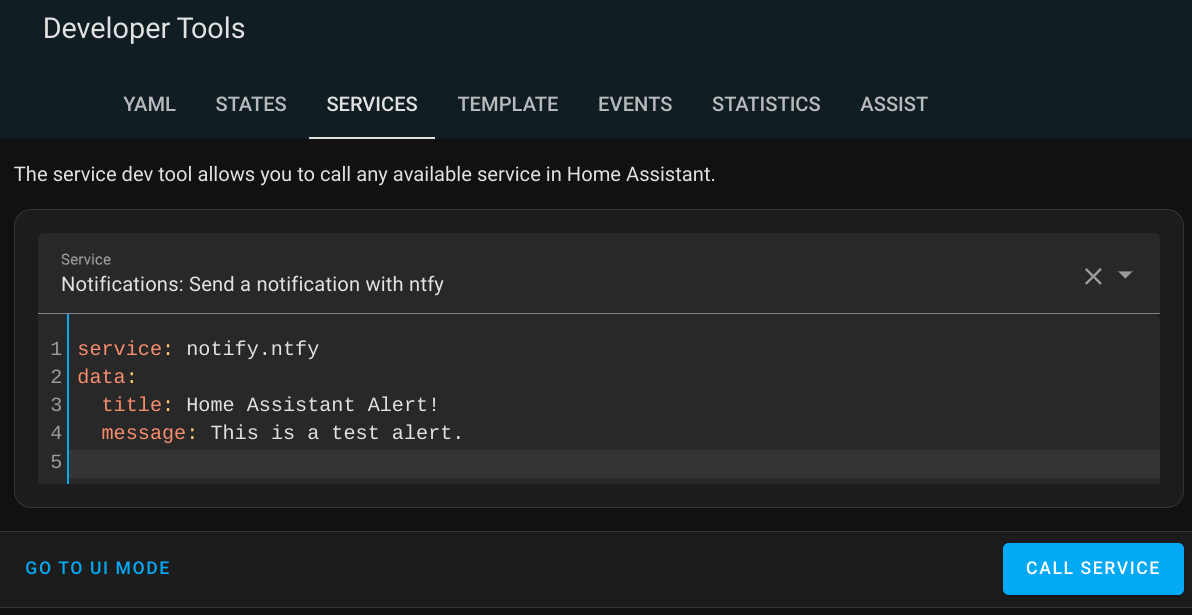
I'll add ntfy to Home Assistant by using the RESTful Notifications integration. For that, I just need to update my instance's configuration.yaml to configure the connection.
# configuration.yaml
notify:
  - name: ntfy
    platform: rest
    method: POST_JSON
    headers:
      Authorization: !secret ntfy_token
    data:
      topic: home_assistant
    title_param_name: title
    message_param_name: message
    resource: https://ntfy.runtimeterror.dev
The Authorization line references a secret stored in secrets.yaml:
# secrets.yaml
ntfy_token: Bearer tk_mm8o6cwxmox11wrnh8miehtivxk7m
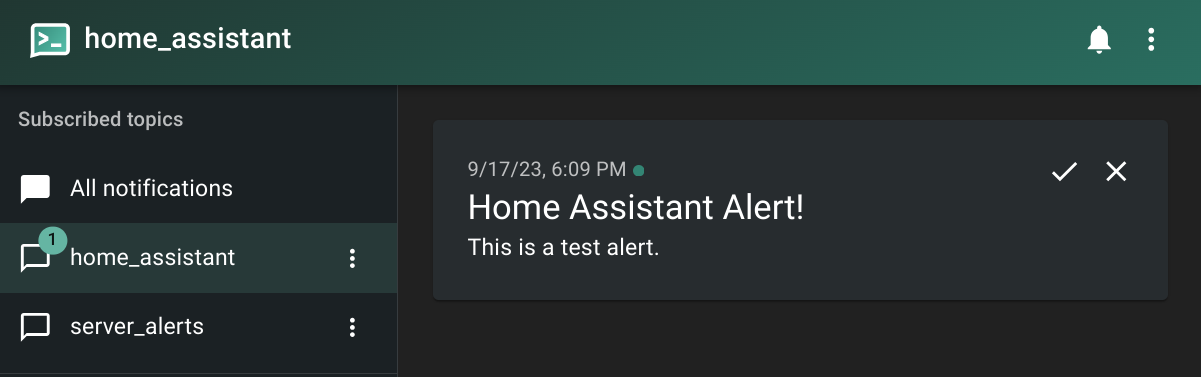
After reloading the Home Assistant configuration, I can use Developer Tools > Services to send a test notification:
Automation Configuration
I'll use the Home Assistant UI to push a notification through ntfy if any of my three water leak sensors switch from Dry to Wet:
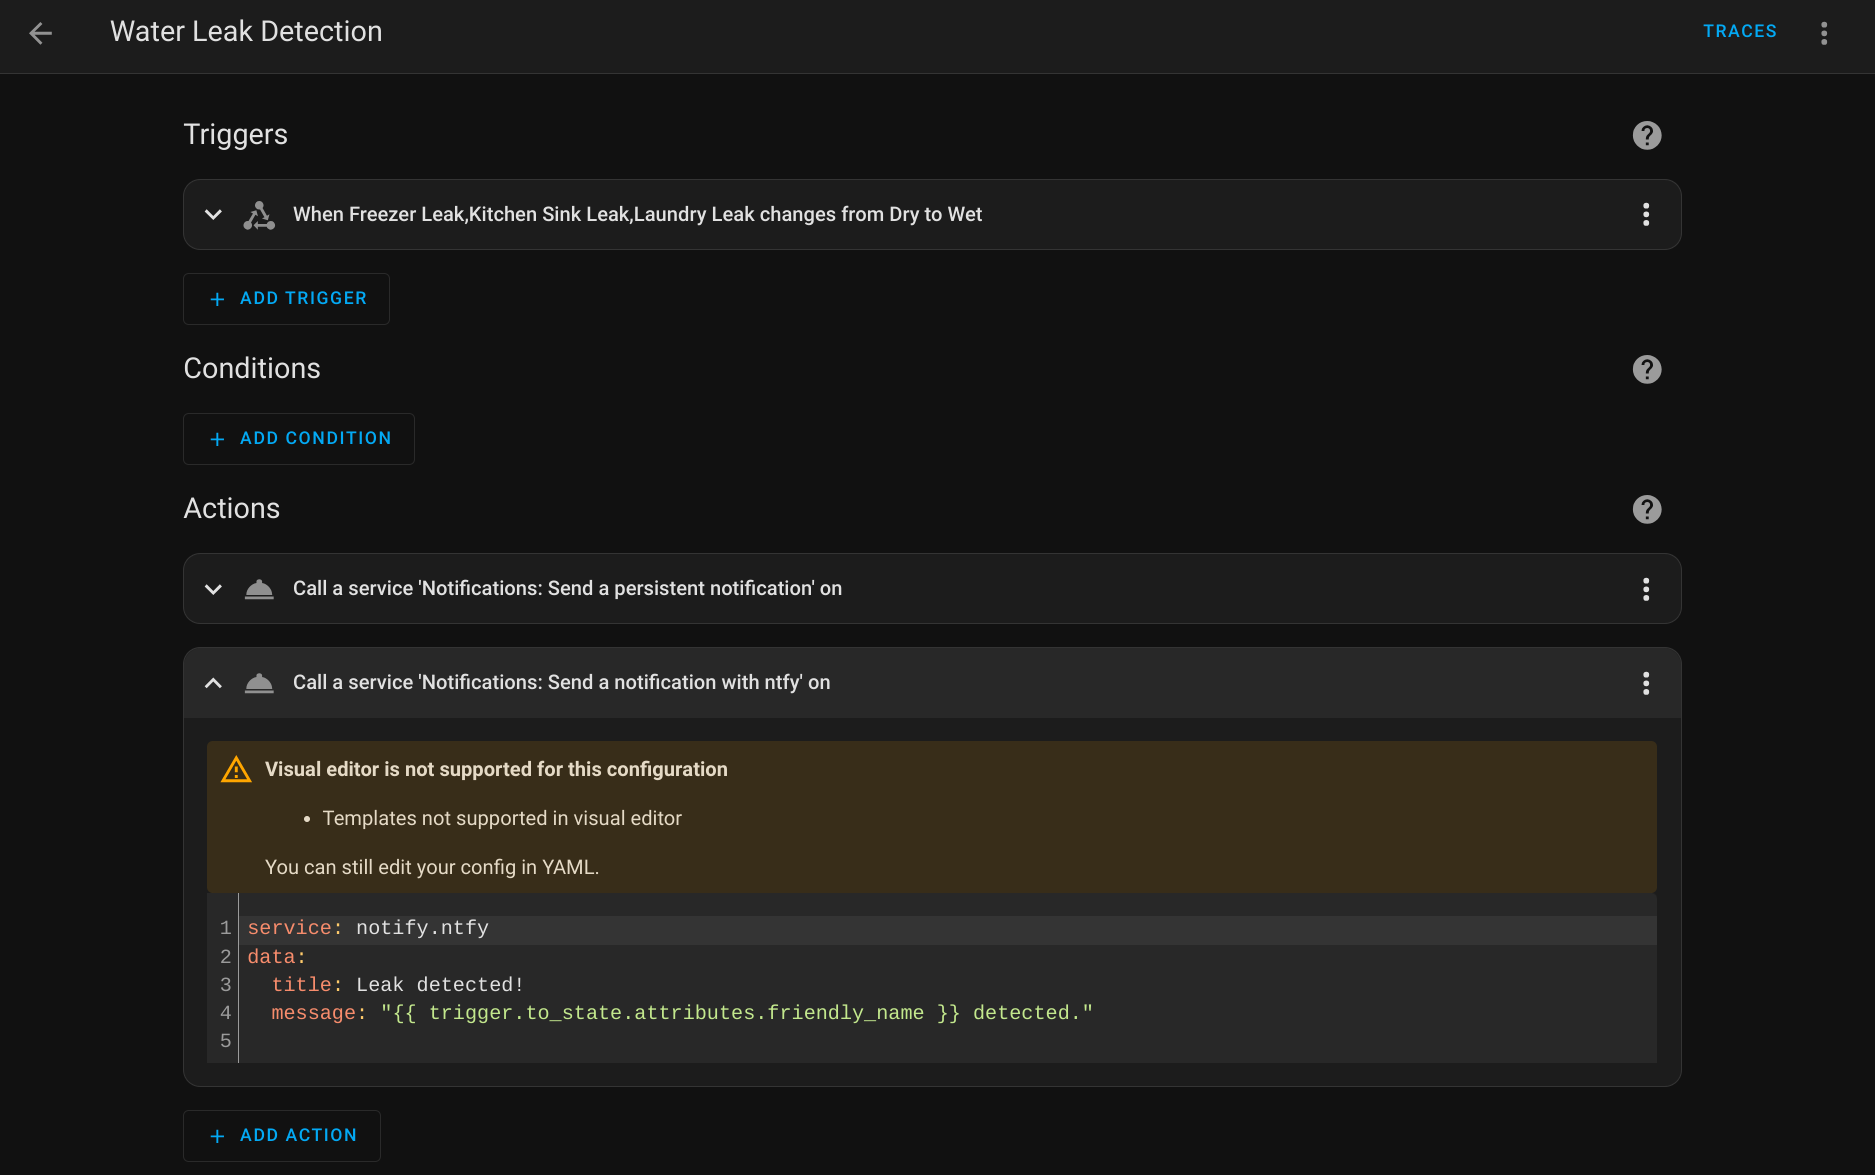
The business end of this is the service call at the end:
service: notify.ntfy
data:
  title: Leak detected!
  message: "{{ trigger.to_state.attributes.friendly_name }} detected."
The Wrap-up
That was pretty easy, right? It didn't take a lot of effort to set up a self-hosted notification server that can be triggered by a simple authenticated HTTP POST, and now my brain is fired up thinking about all the other ways I can use this to stay informed about what's happening on my various systems.
Maybe my notes can help you get started with ntfy.sh, and I hope you'll let me know in the comments if you come up with any other killer use cases. Thanks for reading.