25 KiB
| categories | date | thumbnail | usePageBundles | lastmod | tags | title | |||||||
|---|---|---|---|---|---|---|---|---|---|---|---|---|---|
| Self-Hosting | 2021-06-28T00:00:00Z | 2xe34VJym.png | true | 2021-09-17 |
|
Federated Matrix Server (Synapse) on Oracle Cloud's Free Tier |
I've heard a lot lately about how generous Oracle Cloud's free tier is, particularly when compared with the free offerings from other public cloud providers. Signing up for an account was fairly straight-forward, though I did have to wait a few hours for an actual human to call me on an actual telephone to verify my account. Once in, I thought it would be fun to try building my own Matrix homeserver to really benefit from the network's decentralized-but-federated model for secure end-to-end encrypted communications.
There are two primary projects for Matrix homeservers: Synapse and Dendrite. Dendrite is the newer, more efficient server, but it's not quite feature complete. I'll be using Synapse for my build to make sure that everything works right off the bat, and I will be running the server in a Docker container to make it (relatively) easy to replace if I feel more comfortable about Dendrite in the future.
As usual, it took quite a bit of fumbling about before I got everything working correctly. Here I'll share the steps I used to get up and running.
Instance creation
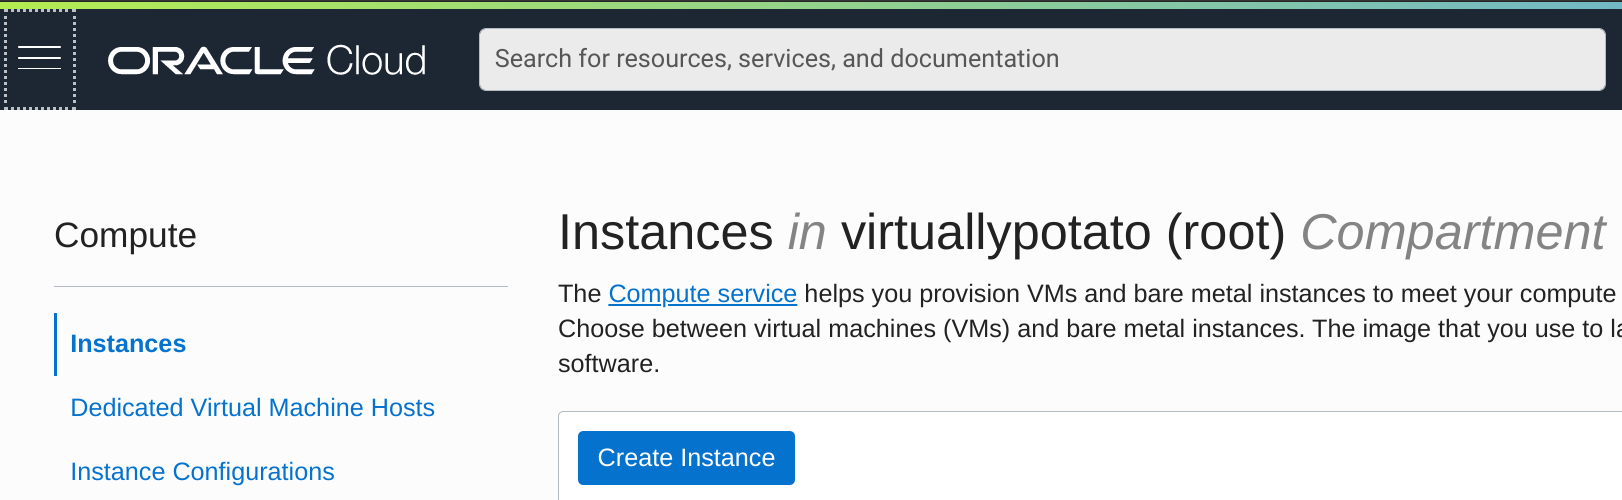
Getting a VM spun up on Oracle Cloud was a pretty simple process. I logged into my account, navigated to Menu -> Compute -> Instances, and clicked on the big blue Create Instance button.
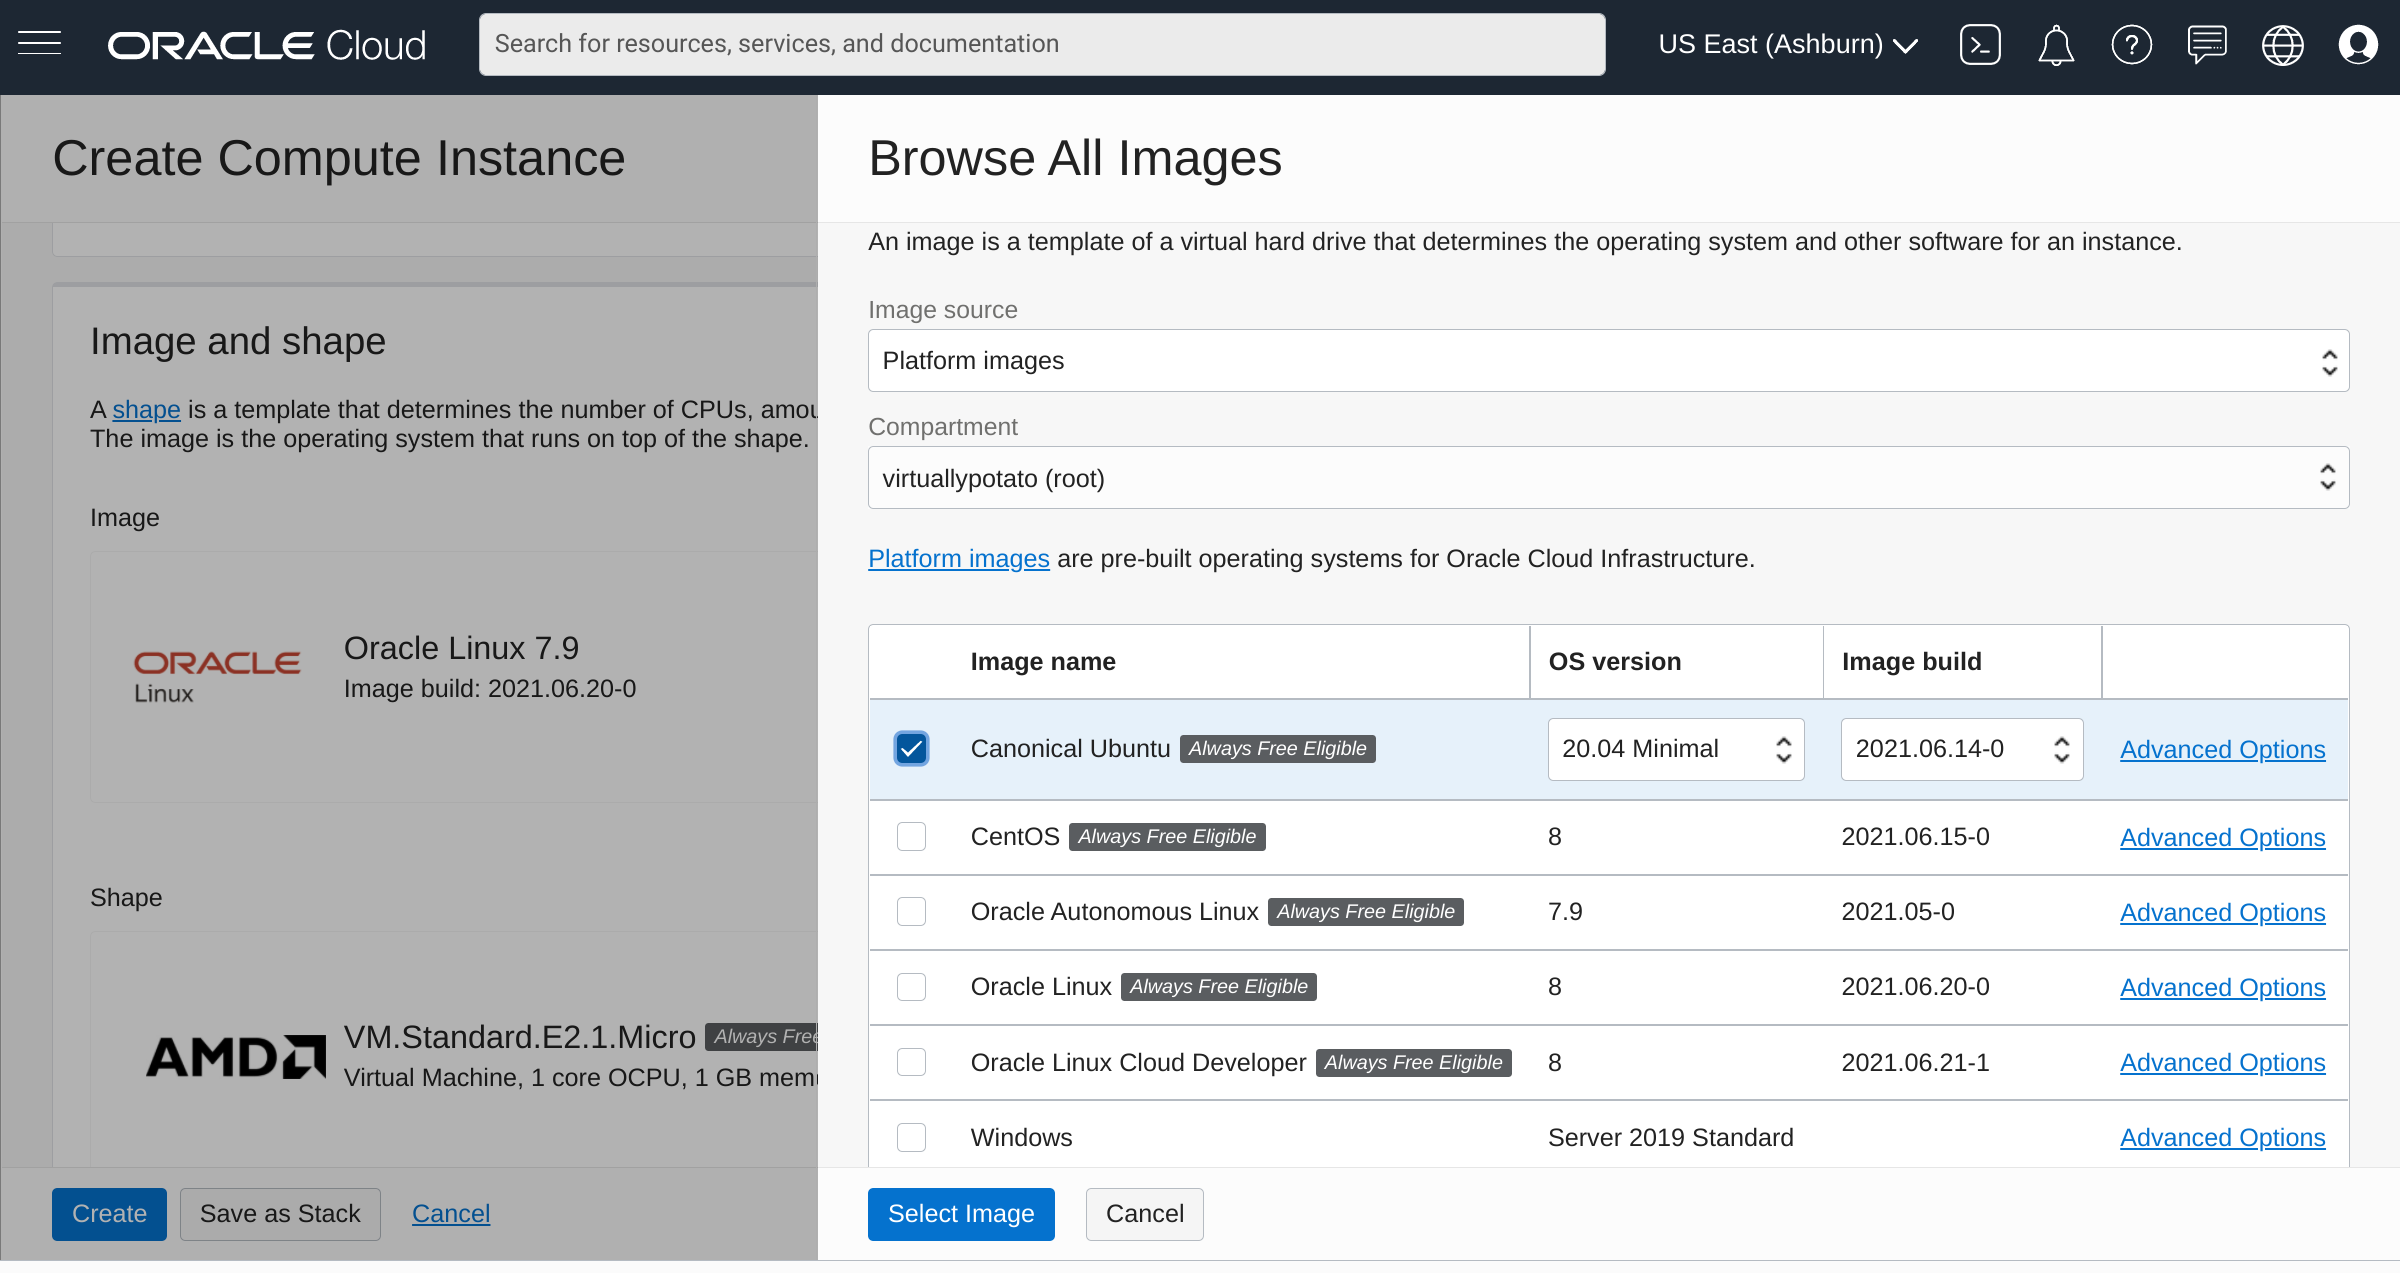
I'll be hosting this for my bowdre.net domain, so I start by naming the instance accordingly: matrix.bowdre.net. Naming it isn't strictly necessary, but it does help with keeping track of things. The instance defaults to using an Oracle Linux image. I'd rather use an Ubuntu one for this, simply because I was able to find more documentation on getting Synapse going on Debian-based systems. So I hit the Edit button next to Image and Shape, select the Change Image option, pick Canonical Ubuntu from the list of available images, and finally click Select Image to confirm my choice.
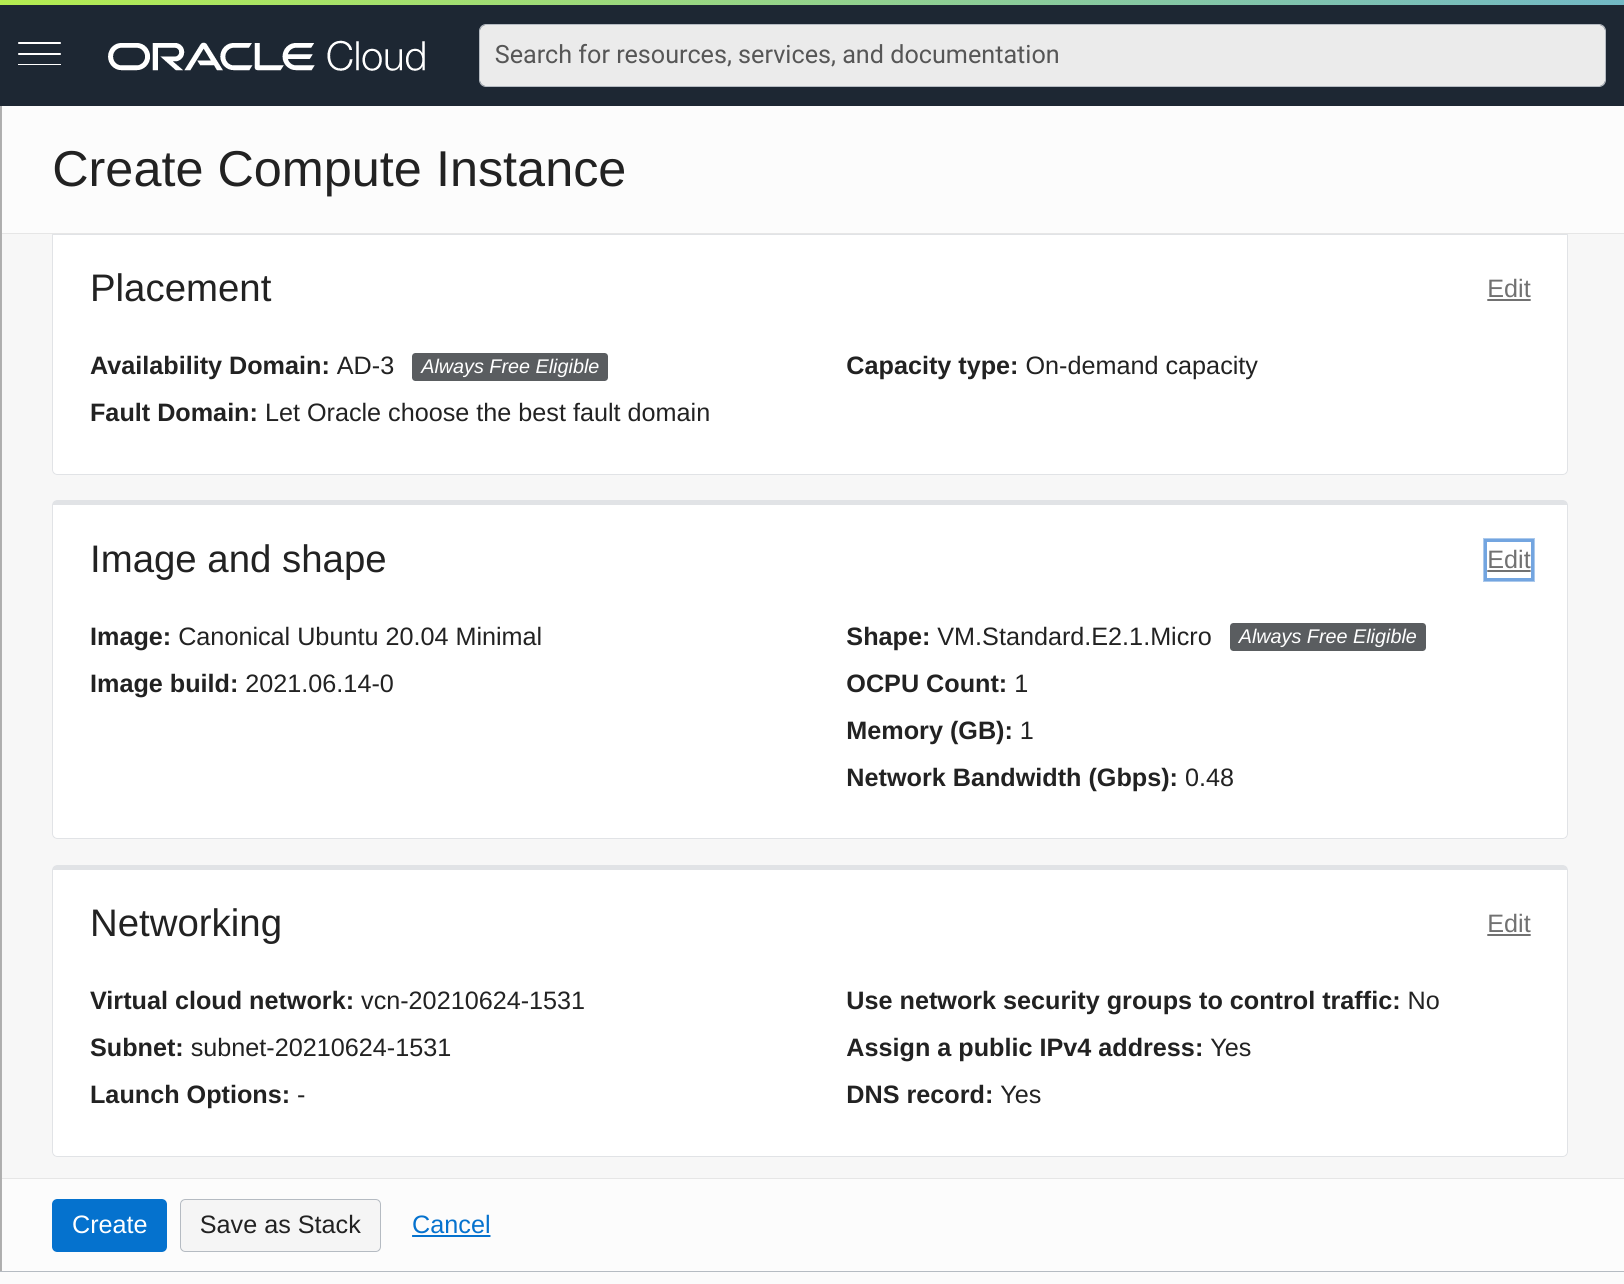
This will be an Ubuntu 20.04 image running on a VM.Standard.E2.1.Micro instance, which gets a single AMD EPYC 7551 CPU with 2.0GHz base frequency and 1GB of RAM. It's not much, but it's free - and it should do just fine for this project.
I can leave the rest of the options as their defaults, making sure that the instance will be allotted a public IPv4 address.
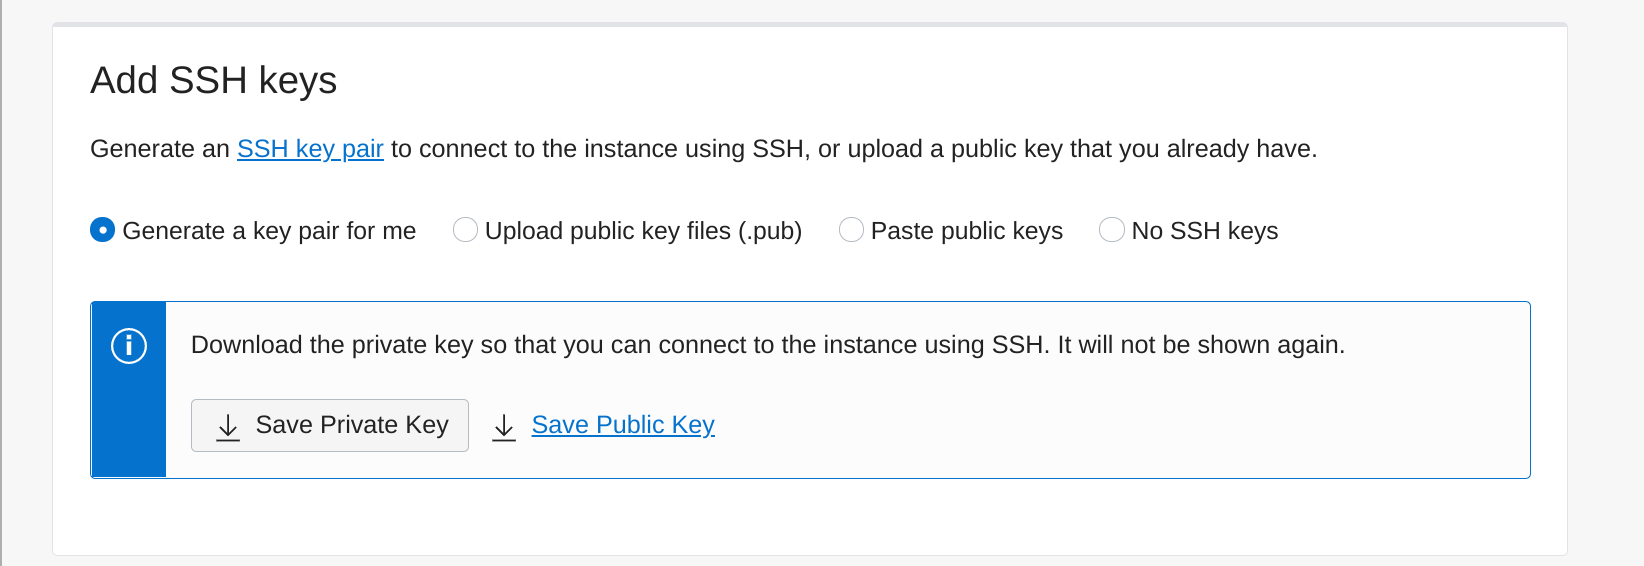
Scrolling down a bit to the Add SSH Keys section, I leave the default Generate a key pair for me option selected, and click the very-important Save Private Key button to download the private key to my computer so that I'll be able to connect to the instance via SSH.
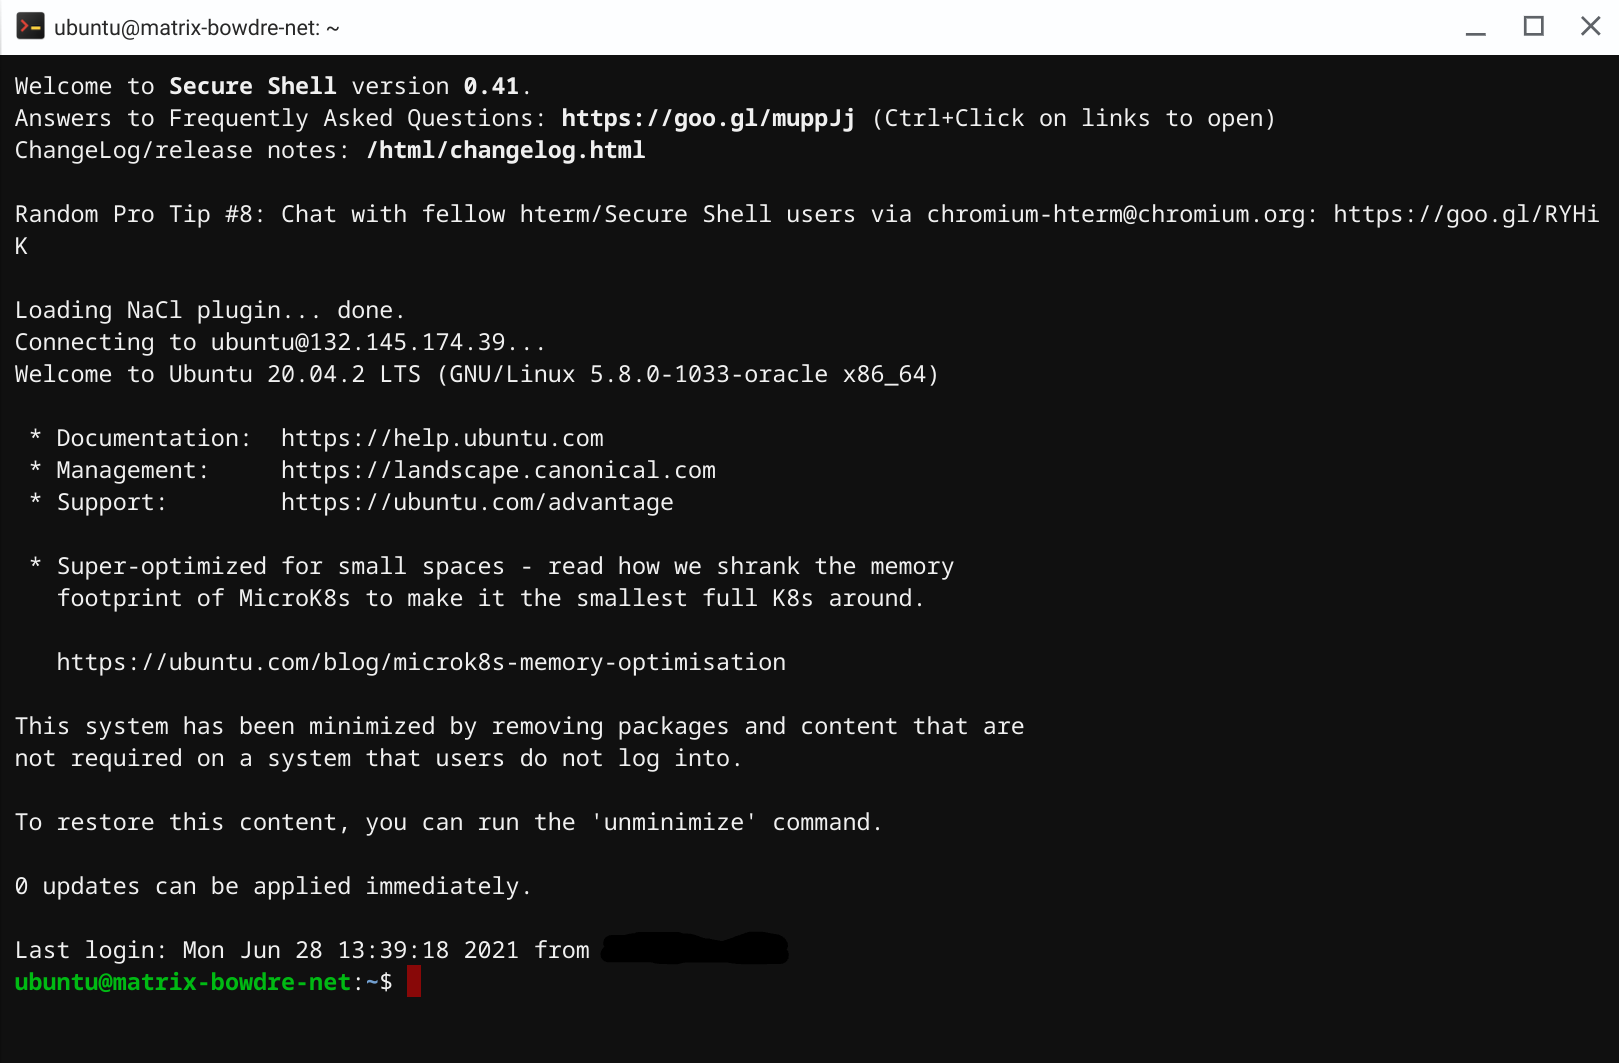
Now I can finally click the blue Create Instance button at the bottom of the screen, and just wait a few minutes for it to start up. Once the status shows a big green "Running" square, I'm ready to connect! I'll copy the listed public IP and make a note of the default username (ubuntu). I can then plug the IP, username, and the private key I downloaded earlier into my SSH client (the Secure Shell extension for Google Chrome since I'm doing this from my Pixelbook), and log in to my new VM in The Cloud.
DNS setup
According to Oracle's docs, the public IP assigned to my instance is mine until I terminate the instance. It should even remain assigned if I stop or restart the instance, just as long as I don't delete the virtual NIC attached to it. So I'll skip the ddclient-based dynamic DNS configuration I've used in the past and instead go straight to my registrar's DNS management portal and create a new A record for matrix.bowdre.net with the instance's public IP.
While I'm managing DNS, it might be good to take a look at the requirements for federating my new server with the other Matrix servers out there. I'd like for users identities on my server to be identified by the bowdre.net domain (@user:bowdre.net) rather than the full matrix.bowdre.net FQDN (@user:matrix.bowdre.net is kind of cumbersome). The standard way to do this to leverage .well-known delegation, where the URL at http://bowdre.net/.well-known/matrix/server would return a JSON structure telling other Matrix servers how to connect to mine:
{
    "m.server": "matrix.bowdre.net:8448"
}
I don't currently have another server already handling requests to bowdre.net, so for now I'll add another A record with the same public IP address to my DNS configuration. Requests for both bowdre.net and matrix.bowdre.net will reach the same server instance, but those requests will be handled differently. More on that later.
An alternative to this .well-known delegation would be to use SRV DNS record delegation to accomplish the same thing. I'd create an SRV record for _matrix._tcp.bowdre.net with the data 0 10 8448 matrix.bowdre.net (priority=0, weight=10, port=8448, target=matrix.bowdre.net) which would again let other Matrix servers know where to send the federation traffic for my server. This approach has an advantage of not needing to make any changes on the bowdre.net web server, but it would require the delegated matrix.bowdre.net server to also return a valid certificate for bowdre.net. Trying to get a Let's Encrypt certificate for a server name that doesn't resolve authoritatively in DNS sounds more complicated than I want to get into with this project, so I'll move forward with my plan to use the .well-known delegation instead.
But first, I need to make sure that the traffic reaches the server to begin with.
Firewall configuration
Synapse listens on port 8008 for connections from messaging clients, and typically uses port 8448 for federation traffic from other Matrix servers. Rather than expose those ports directly, I'm going to put Synapse behind a reverse proxy on HTTPS port 443. I'll also need to allow inbound traffic HTTP port 80 for ACME certificate challenges. I've got two firewalls to contend with: the Oracle Cloud one which blocks traffic from getting into my virtual cloud network, and the host firewall running inside the VM.
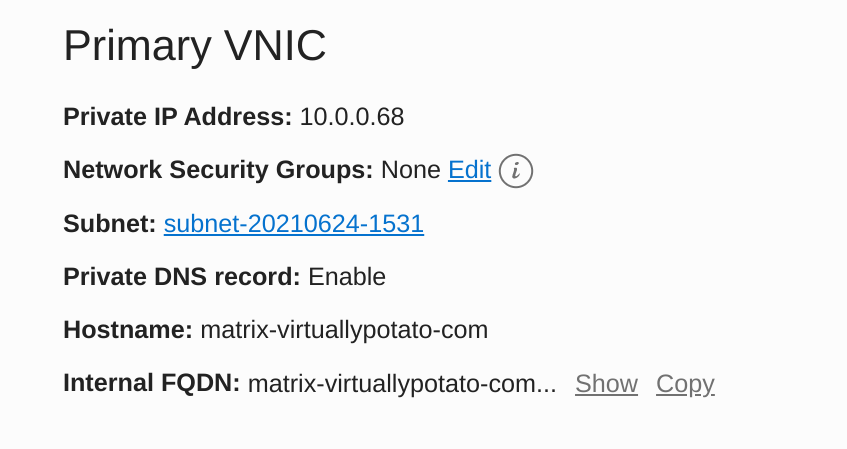
I'll tackle the cloud firewall first. From the page showing my instance details, I click on the subnet listed under the Primary VNIC heading:
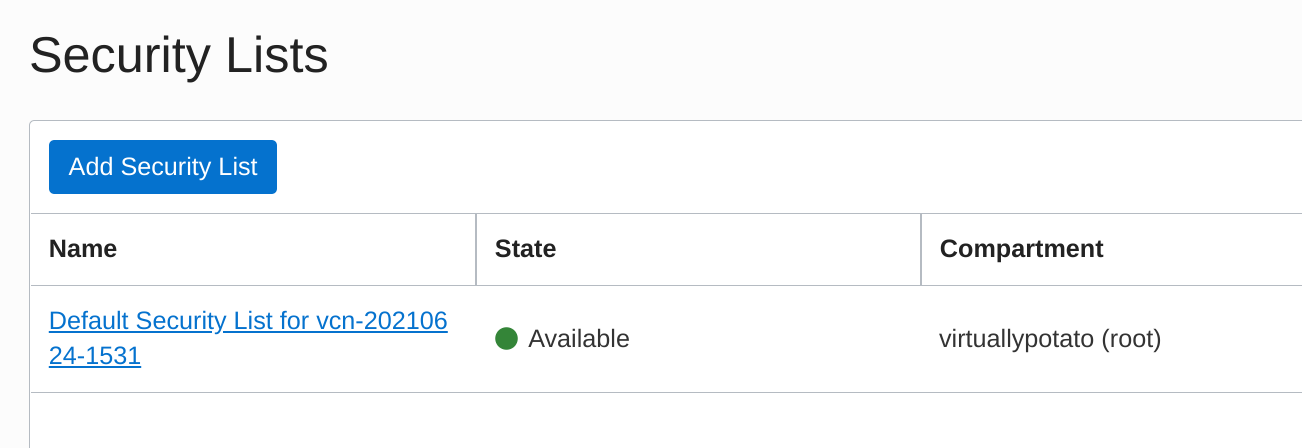
I then look in the Security Lists section and click on the Default Security List:
The Ingress Rules section lists the existing inbound firewall exceptions, which by default is basically just SSH. I click on Add Ingress Rules to create a new one.
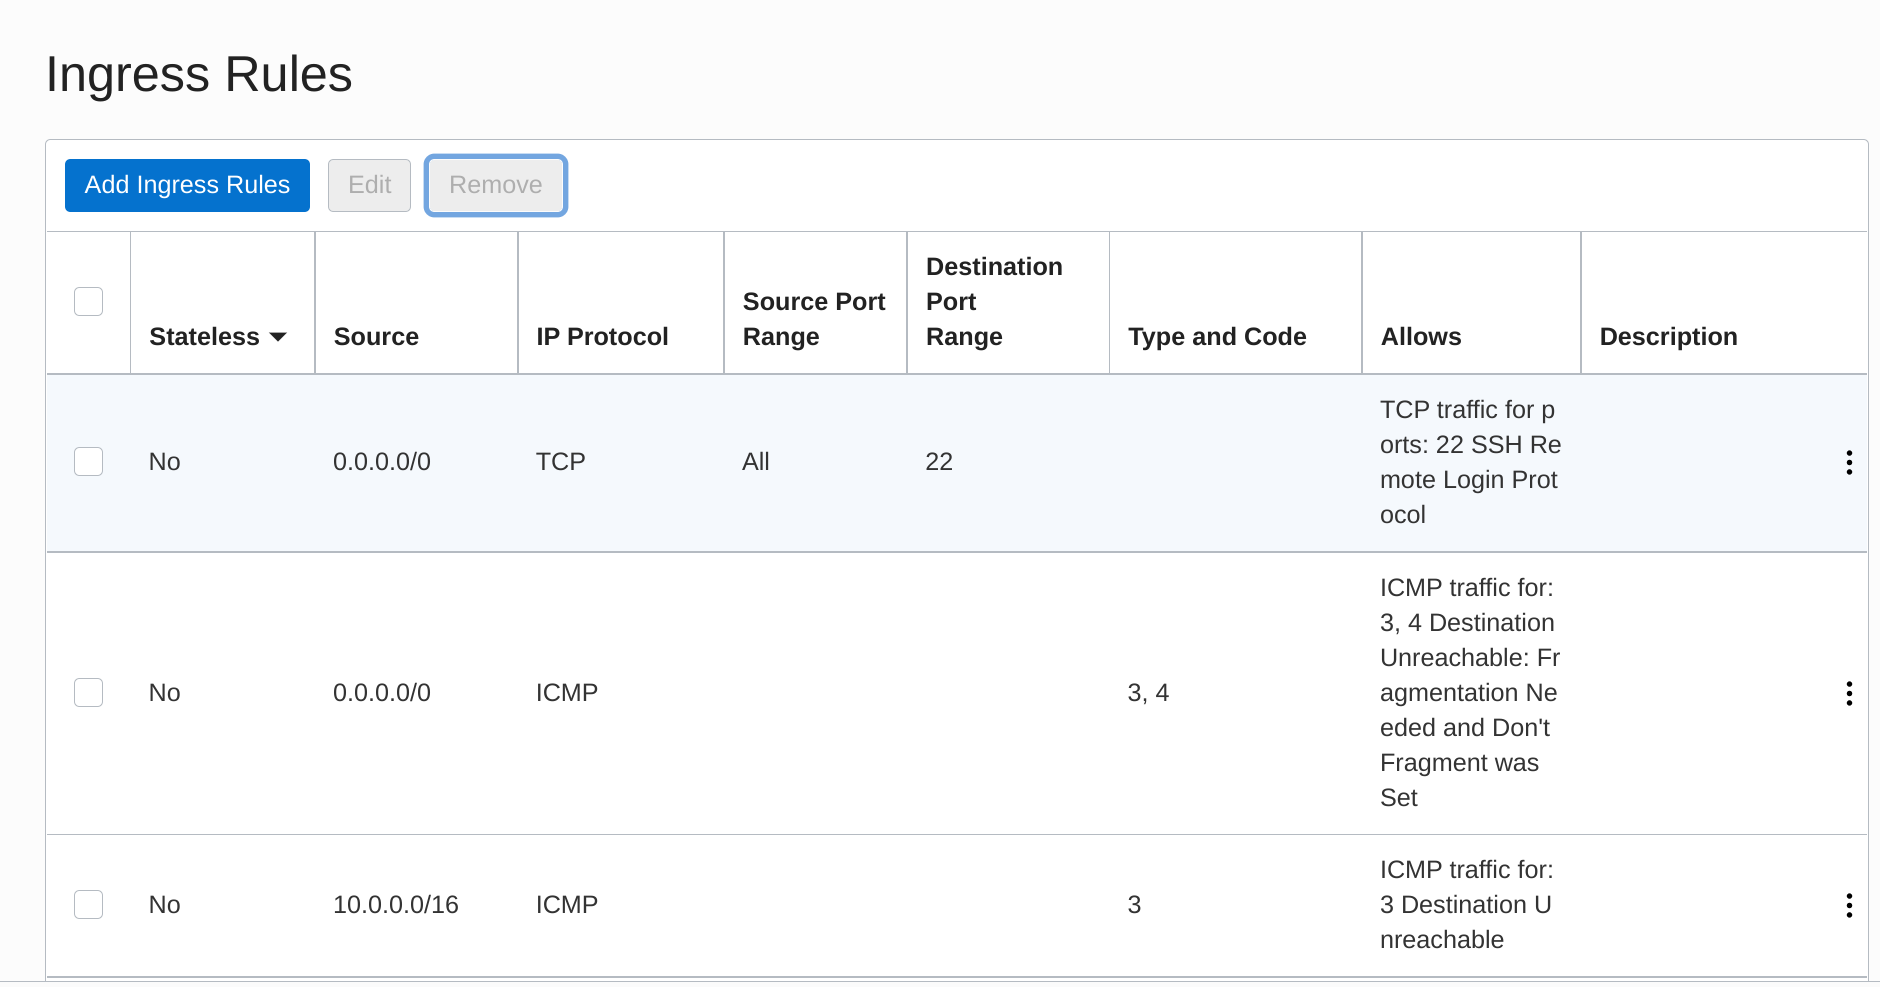
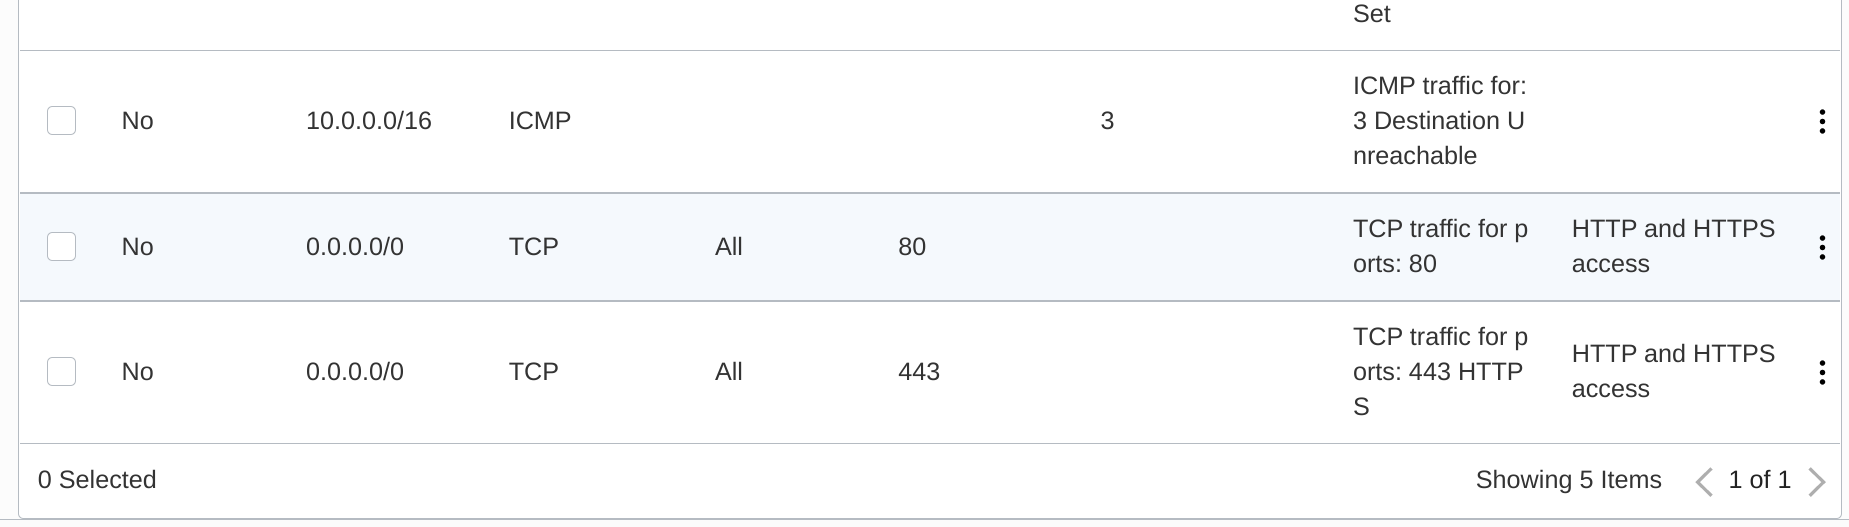
I want this to apply to traffic from any source IP so I enter the CIDR 0.0.0.0/0, and I enter the Destination Port Range as 80,443. I also add a brief description and click Add Ingress Rules.

Success! My new ingress rules appear at the bottom of the list.
That gets traffic from the internet and to my instance, but the OS is still going to drop the traffic at its own firewall. I'll need to work with iptables to change that. (You typically use ufw to manage firewalls more easily on Ubuntu, but it isn't included on this minimal image and seemed to butt heads with iptables when I tried adding it. I eventually decided it was better to just interact with iptables directly). I'll start by listing the existing rules on the INPUT chain:
sudo iptables -L INPUT --line-numbers # [tl! .cmd]
Chain INPUT (policy ACCEPT) # [tl! .nocopy:7]
num  target     prot opt source               destination
1    ACCEPT     all  --  anywhere             anywhere             state RELATED,ESTABLISHED
2    ACCEPT     icmp --  anywhere             anywhere
3    ACCEPT     all  --  anywhere             anywhere
4    ACCEPT     udp  --  anywhere             anywhere             udp spt:ntp
5    ACCEPT     tcp  --  anywhere             anywhere             state NEW tcp dpt:ssh
6    REJECT     all  --  anywhere             anywhere             reject-with icmp-host-prohibited
Note the REJECT all statement at line 6. I'll need to insert my new ACCEPT rules for ports 80 and 443 above that implicit deny all:
sudo iptables -I INPUT 6 -m state --state NEW -p tcp --dport 80 -j ACCEPT # [tl! .cmd:1]
sudo iptables -I INPUT 6 -m state --state NEW -p tcp --dport 443 -j ACCEPT
And then I'll confirm that the order is correct:
sudo iptables -L INPUT --line-numbers # [tl! .cmd]
Chain INPUT (policy ACCEPT) # [tl! .nocopy:9]
num  target     prot opt source               destination
1    ACCEPT     all  --  anywhere             anywhere             state RELATED,ESTABLISHED
2    ACCEPT     icmp --  anywhere             anywhere
3    ACCEPT     all  --  anywhere             anywhere
4    ACCEPT     udp  --  anywhere             anywhere             udp spt:ntp
5    ACCEPT     tcp  --  anywhere             anywhere             state NEW tcp dpt:ssh
6    ACCEPT     tcp  --  anywhere             anywhere             state NEW tcp dpt:https
7    ACCEPT     tcp  --  anywhere             anywhere             state NEW tcp dpt:http
8    REJECT     all  --  anywhere             anywhere             reject-with icmp-host-prohibited
I can use nmap running from my local Linux environment to confirm that I can now reach those ports on the VM. (They're still "closed" since nothing is listening on the ports yet, but the connections aren't being rejected.)
nmap -Pn matrix.bowdre.net # [tl! .cmd]
Starting Nmap 7.70 ( https://nmap.org ) at 2021-06-27 12:49 CDT # [tl! .nocopy:10]
Nmap scan report for matrix.bowdre.net(150.136.6.180)
Host is up (0.086s latency).
Other addresses for matrix.bowdre.net (not scanned): 2607:7700:0:1d:0:1:9688:6b4
Not shown: 997 filtered ports
PORT    STATE  SERVICE
22/tcp  open   ssh
80/tcp  closed http
443/tcp closed https

Nmap done: 1 IP address (1 host up) scanned in 8.44 seconds
Cool! Before I move on, I'll be sure to make the rules persistent so they'll be re-applied whenever iptables starts up:
sudo netfilter-persistent save # [tl! .cmd]
run-parts: executing /usr/share/netfilter-persistent/plugins.d/15-ip4tables save # [tl! .nocopy:1]
run-parts: executing /usr/share/netfilter-persistent/plugins.d/25-ip6tables save
Reverse proxy setup
I had initially planned on using certbot to generate Let's Encrypt certificates, and then reference the certs as needed from an nginx or Apache reverse proxy configuration. While researching how the proxy would need to be configured to front Synapse, I found this sample nginx configuration:
# torchlight! {"lineNumbers": true}
server {
    listen 443 ssl http2;
    listen [::]:443 ssl http2;

    # For the federation port
    listen 8448 ssl http2 default_server;
    listen [::]:8448 ssl http2 default_server;

    server_name matrix.example.com;

    location ~* ^(\/_matrix|\/_synapse\/client) {
        proxy_pass http://localhost:8008;
        proxy_set_header X-Forwarded-For $remote_addr;
        proxy_set_header X-Forwarded-Proto $scheme;
        proxy_set_header Host $host;

        # Nginx by default only allows file uploads up to 1M in size
        # Increase client_max_body_size to match max_upload_size defined in homeserver.yaml
        client_max_body_size 50M;
    }
}
And this sample Apache one:
# torchlight! {"lineNumbers": true}
<VirtualHost *:443>
    SSLEngine on
    ServerName matrix.example.com

    RequestHeader set "X-Forwarded-Proto" expr=%{REQUEST_SCHEME}
    AllowEncodedSlashes NoDecode
    ProxyPreserveHost on
    ProxyPass /_matrix http://127.0.0.1:8008/_matrix nocanon
    ProxyPassReverse /_matrix http://127.0.0.1:8008/_matrix
    ProxyPass /_synapse/client http://127.0.0.1:8008/_synapse/client nocanon
    ProxyPassReverse /_synapse/client http://127.0.0.1:8008/_synapse/client
</VirtualHost>

<VirtualHost *:8448>
    SSLEngine on
    ServerName example.com

    RequestHeader set "X-Forwarded-Proto" expr=%{REQUEST_SCHEME}
    AllowEncodedSlashes NoDecode
    ProxyPass /_matrix http://127.0.0.1:8008/_matrix nocanon
    ProxyPassReverse /_matrix http://127.0.0.1:8008/_matrix
</VirtualHost>
I also found this sample config for another web server called Caddy:
# torchlight! {"lineNumbers": true}
matrix.example.com {
  reverse_proxy /_matrix/* http://localhost:8008
  reverse_proxy /_synapse/client/* http://localhost:8008
}

example.com:8448 {
  reverse_proxy http://localhost:8008
}
One of these looks much simpler than the other two. I'd never heard of Caddy so I did some quick digging, and I found that it would actually handle the certificates entirely automatically - in addition to having a much easier config. Installing Caddy wasn't too bad, either:
sudo apt install -y debian-keyring debian-archive-keyring apt-transport-https # [tl! .cmd:4]
curl -1sLf 'https://dl.cloudsmith.io/public/caddy/stable/gpg.key' | sudo apt-key add -
curl -1sLf 'https://dl.cloudsmith.io/public/caddy/stable/debian.deb.txt' | sudo tee /etc/apt/sources.list.d/caddy-stable.list
sudo apt update
sudo apt install caddy
Then I just need to put my configuration into the default Caddyfile, including the required .well-known delegation piece from earlier.
# torchlight! {"lineNumbers": true}
# /etc/caddy/Caddyfile
matrix.bowdre.net {
  reverse_proxy /_matrix/* http://localhost:8008
  reverse_proxy /_synapse/client/* http://localhost:8008
}

bowdre.net {
  route {
    respond /.well-known/matrix/server `{"m.server": "matrix.bowdre.net:443"}`
    redir https://virtuallypotato.com
  }
}
There's a lot happening in that 11-line Caddyfile, but it's not complicated by any means. The matrix.bowdre.net section is pretty much exactly yanked from the sample config, and it's going to pass any requests that start like matrix.bowdre.net/_matrix/ or matrix.bowdre.net/_synapse/client/ through to the Synapse server listening locally on port 8008. Caddy will automatically request and apply a Let's Encrypt or ZeroSSL cert for any server names spelled out in the config - very slick!
I set up the bowdre.net section to return the appropriate JSON string to tell other Matrix servers to connect to matrix.bowdre.net on port 443 (so that I don't have to open port 8448 through the firewalls), and to redirect all other traffic to one of my favorite technical blogs (maybe you've heard of it?). I had to wrap the respond and redir directives in a route { } block because otherwise Caddy's implicit precedence would execute the redirect for all traffic and never hand out the necessary .well-known data.
(I wouldn't need that section at all if I were using a separate web server for bowdre.net; instead, I'd basically just add that respond /.well-known/matrix/server line to that other server's config.)
Now to enable the caddy service, start it, and restart it so that it loads the new config:
sudo systemctl enable caddy # [tl! .cmd:2]
sudo systemctl start caddy
sudo systemctl restart caddy
If I repeat my nmap scan from earlier, I'll see that the HTTP and HTTPS ports are now open. The server still isn't actually serving anything on those ports yet, but at least it's listening.
nmap -Pn matrix.bowdre.net # [tl! .cmd]
Starting Nmap 7.70 ( https://nmap.org ) at 2021-06-27 13:44 CDT # [tl! .nocopy:9]
Nmap scan report for matrix.bowdre.net (150.136.6.180)
Host is up (0.034s latency).
Not shown: 997 filtered ports
PORT    STATE SERVICE
22/tcp  open  ssh
80/tcp  open  http
443/tcp open  https

Nmap done: 1 IP address (1 host up) scanned in 5.29 seconds
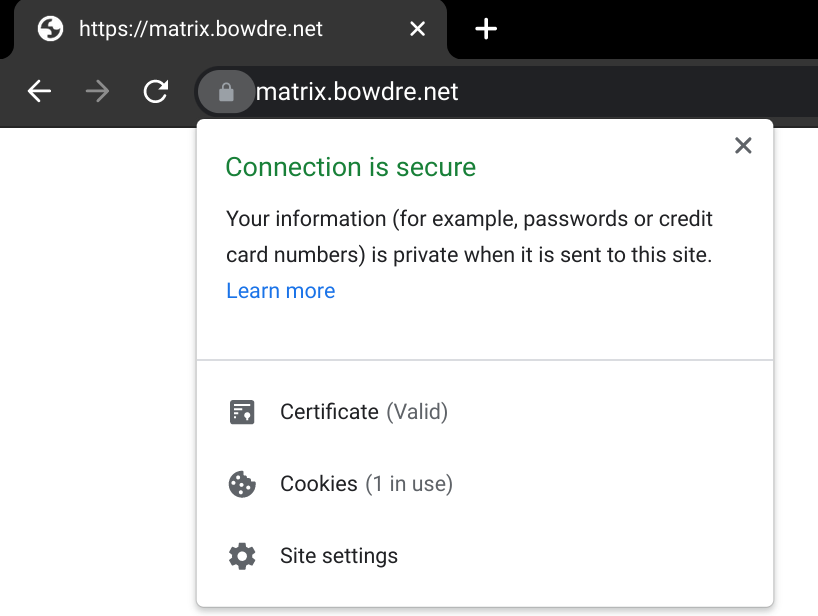
Browsing to https://matrix.bowdre.net shows a blank page - but a valid and trusted certificate that I did absolutely nothing to configure!
The .well-known URL also returns the expected JSON:

And trying to hit anything else at https://bowdre.net brings me right back here.
And again, the config to do all this (including getting valid certs for two server names!) is just 11 lines long. Caddy is seriously and magically cool.
Okay, let's actually serve something up now.
Synapse installation
Docker setup
Before I can get on with deploying Synapse in Docker, I first need to install Docker on the system:
sudo apt-get install \ # [tl! .cmd]
  apt-transport-https \
  ca-certificates \
  curl \
  gnupg \
  lsb-release

curl -fsSL https://download.docker.com/linux/ubuntu/gpg | \ # [tl! .cmd]
  sudo gpg --dearmor -o /usr/share/keyrings/docker-archive-keyring.gpg

echo \ # [tl! .cmd]
  "deb [arch=amd64 signed-by=/usr/share/keyrings/docker-archive-keyring.gpg] https://download.docker.com/linux/ubuntu \
  $(lsb_release -cs) stable" | sudo tee /etc/apt/sources.list.d/docker.list > /dev/null

sudo apt update # [tl! .cmd:1]
sudo apt install docker-ce docker-ce-cli containerd.io
I'll also install Docker Compose:
sudo curl -L "https://github.com/docker/compose/releases/download/1.29.2/docker-compose-$(uname -s)-$(uname -m)" \ # [tl! .cmd]
  -o /usr/local/bin/docker-compose
sudo chmod +x /usr/local/bin/docker-compose # [tl! .cmd]
And I'll add my ubuntu user to the docker group so that I won't have to run every docker command with sudo:
sudo usermod -G docker -a ubuntu # [tl! .cmd]
I'll log out and back in so that the membership change takes effect, and then test both docker and docker-compose to make sure they're working:
docker --version # [tl! .cmd]
Docker version 20.10.7, build f0df350 # [tl! .nocopy:1]

docker-compose --version # [tl! .cmd]
docker-compose version 1.29.2, build 5becea4c # [tl! .nocopy]
Synapse setup
Now I'll make a place for the Synapse installation to live, including a data folder that will be mounted into the container:
sudo mkdir -p /opt/matrix/synapse/data # [tl! .cmd:1]
cd /opt/matrix/synapse
And then I'll create the compose file to define the deployment:
# torchlight! {"lineNumbers": true}
# /opt/matrix/synapse/docker-compose.yaml
services:
  synapse:
    container_name: "synapse"
    image: "matrixdotorg/synapse"
    restart: "unless-stopped"
    ports:
      - "127.0.0.1:8008:8008"
    volumes:
      - "./data/:/data/"
Before I can fire this up, I'll need to generate an initial configuration as described in the documentation. Here I'll specify the server name that I'd like other Matrix servers to know mine by (bowdre.net):
docker run -it --rm \ # [tl! .cmd]
    -v "/opt/matrix/synapse/data:/data" \
    -e SYNAPSE_SERVER_NAME=bowdre.net \
    -e SYNAPSE_REPORT_STATS=yes \
    matrixdotorg/synapse generate
# [tl! .nocopy:start]
Unable to find image 'matrixdotorg/synapse:latest' locally
latest: Pulling from matrixdotorg/synapse
69692152171a: Pull complete
66a3c154490a: Pull complete
3e35bdfb65b2: Pull complete
f2c4c4355073: Pull complete
65d67526c337: Pull complete
5186d323ad7f: Pull complete
436afe4e6bba: Pull complete
c099b298f773: Pull complete
50b871f28549: Pull complete
Digest: sha256:5ccac6349f639367fcf79490ed5c2377f56039ceb622641d196574278ed99b74
Status: Downloaded newer image for matrixdotorg/synapse:latest
Creating log config /data/bowdre.net.log.config
Generating config file /data/homeserver.yaml
Generating signing key file /data/bowdre.net.signing.key
A config file has been generated in '/data/homeserver.yaml' for server name 'bowdre.net'. Please review this file and customise it to your needs. # [tl! .nocopy:end]
As instructed, I'll use sudo vi data/homeserver.yaml to review/modify the generated config. I'll leave
server_name: "bowdre.net"
since that's how I'd like other servers to know my server, and I'll uncomment/edit in:
public_baseurl: https://matrix.bowdre.net
since that's what users (namely, me) will put into their Matrix clients to connect.
And for now, I'll temporarily set:
enable_registration: true
so that I can create a user account without fumbling with the CLI. I'll be sure to set enable_registration: false again once I've registered the account(s) I need to have on my server. The instance has limited resources so it's probably not a great idea to let just anybody create an account on it.
There are a bunch of other useful configurations that can be made here, but these will do to get things going for now.
Time to start it up:
docker-compose up -d # [tl! .cmd]
Creating network "synapse_default" with the default driver # [tl! .nocopy:1]
Creating synapse ... done
And use docker ps to confirm that it's running:
docker ps # [tl! .cmd]
CONTAINER ID   IMAGE                  COMMAND       CREATED          STATUS                    PORTS                                          NAMES # [tl! .nocopy:1]
573612ec5735   matrixdotorg/synapse   "/start.py"   25 seconds ago   Up 23 seconds (healthy)   8009/tcp, 127.0.0.1:8008->8008/tcp, 8448/tcp   synapse
Testing
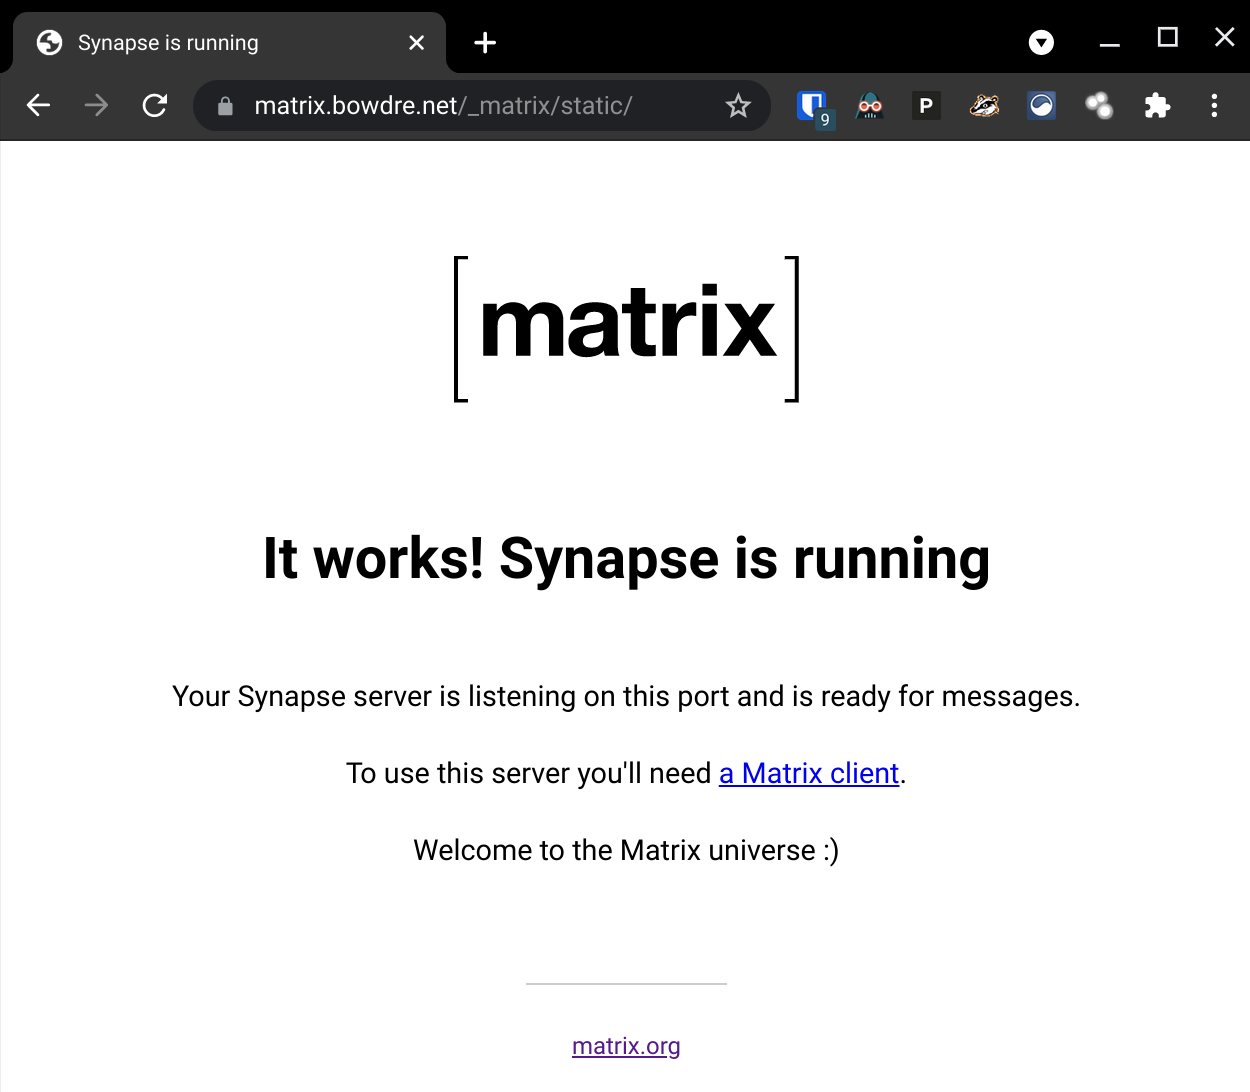
And I can point my browser to https://matrix.bowdre.net/_matrix/static/ and see the Matrix landing page:
Before I start trying to connect with a client, I'm going to plug the server address in to the Matrix Federation Tester to make sure that other servers will be able to talk to it without any problems:
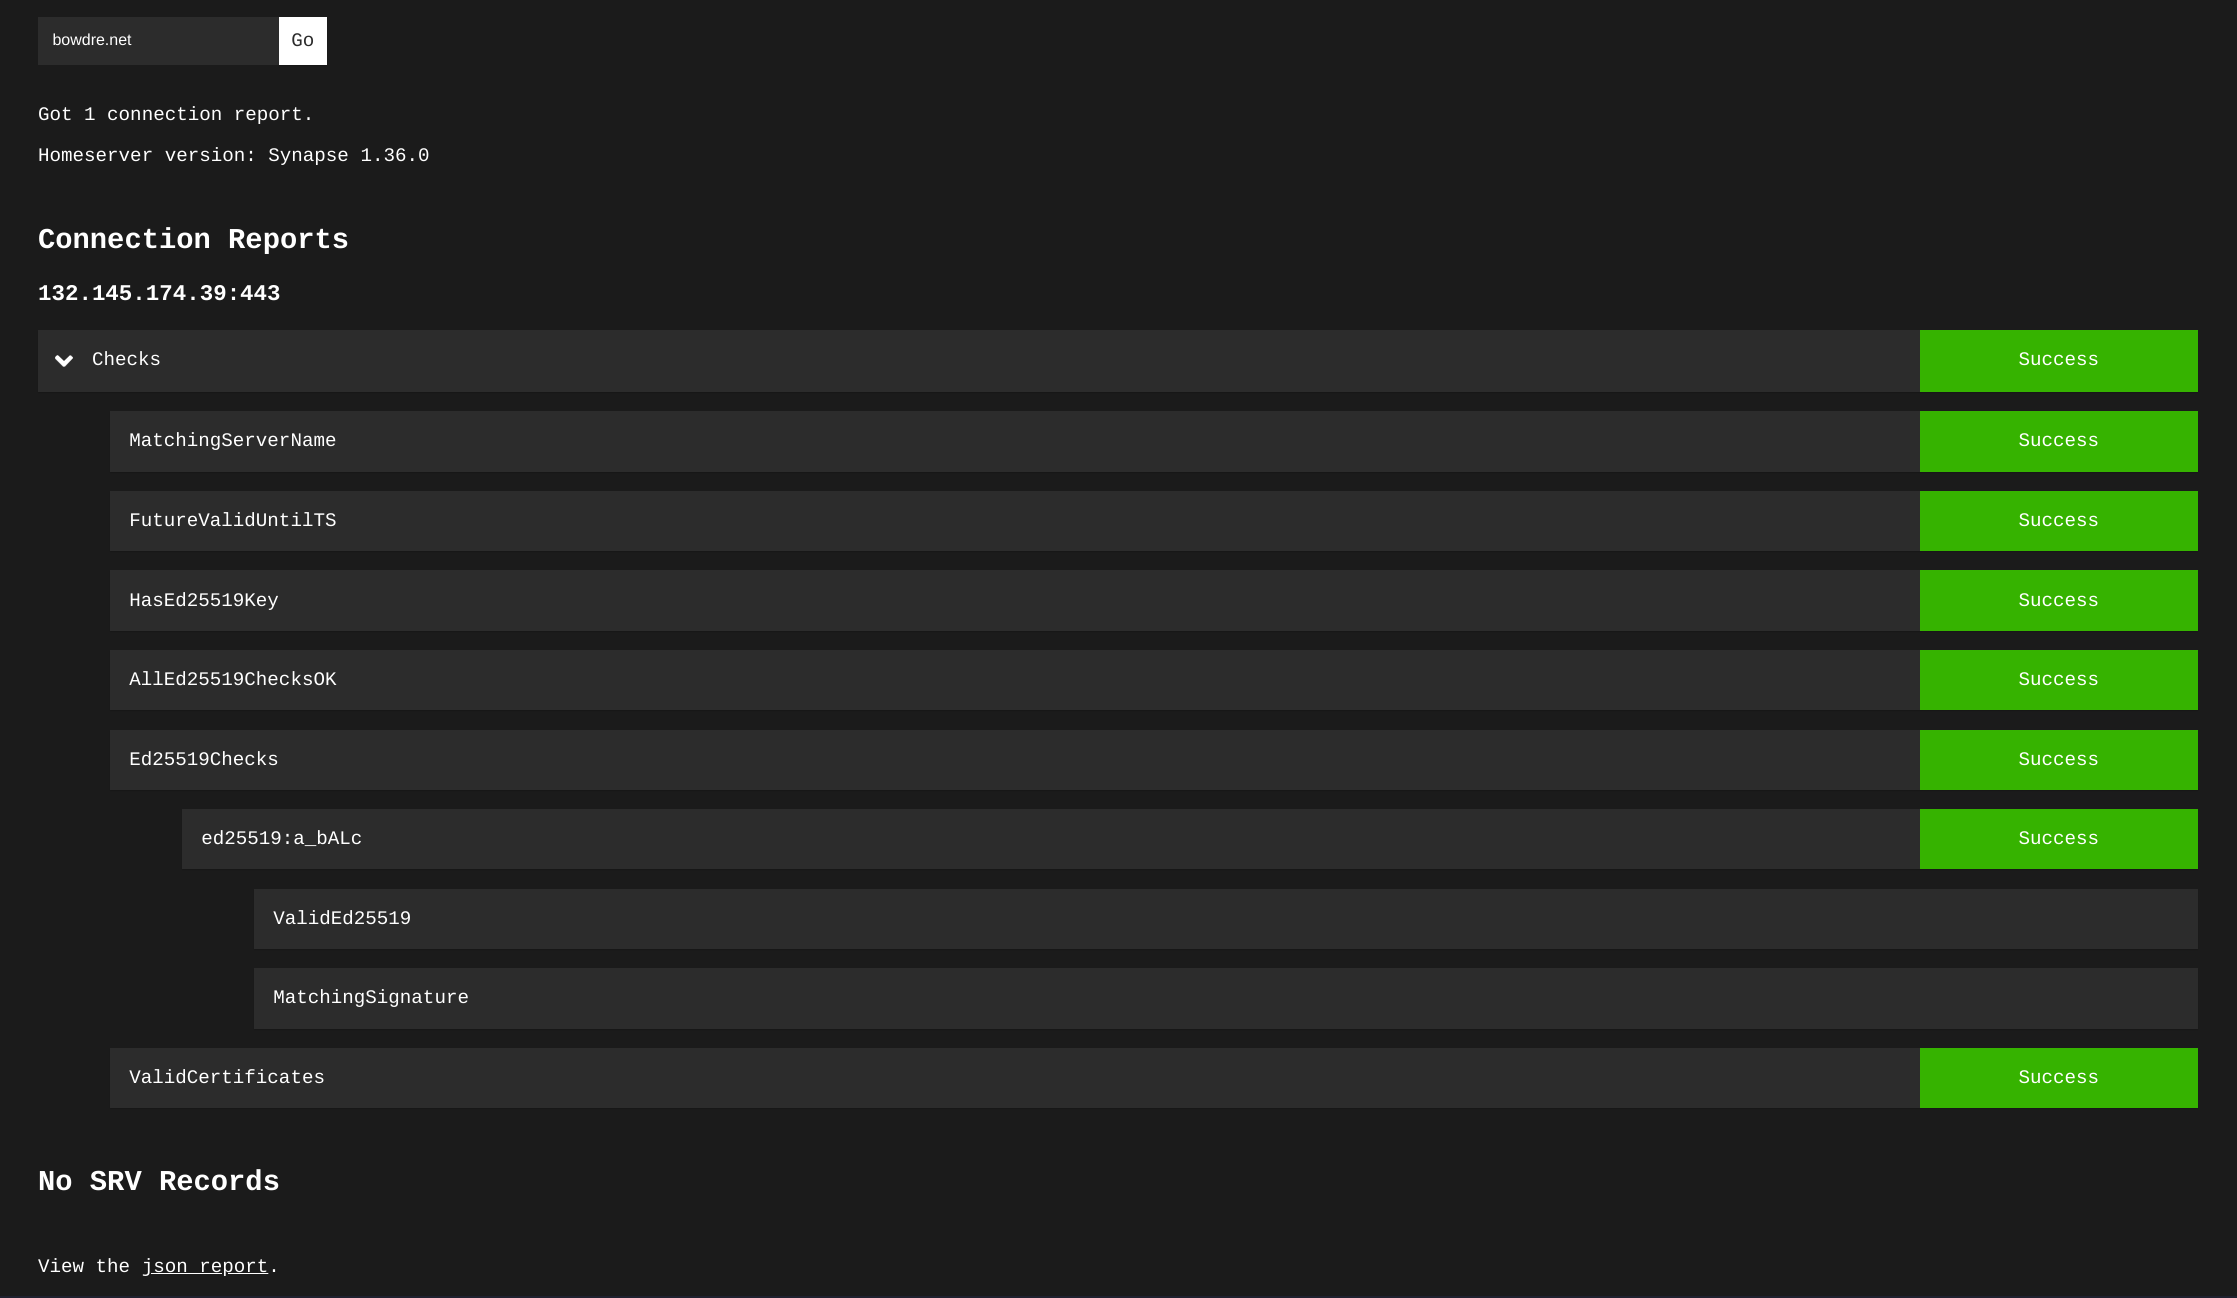
And I can view the JSON report at the bottom of the page to confirm that it's correctly pulling my .well-known delegation:
{
  "WellKnownResult": {
    "m.server": "matrix.bowdre.net:443",
    "CacheExpiresAt": 0
  },
}
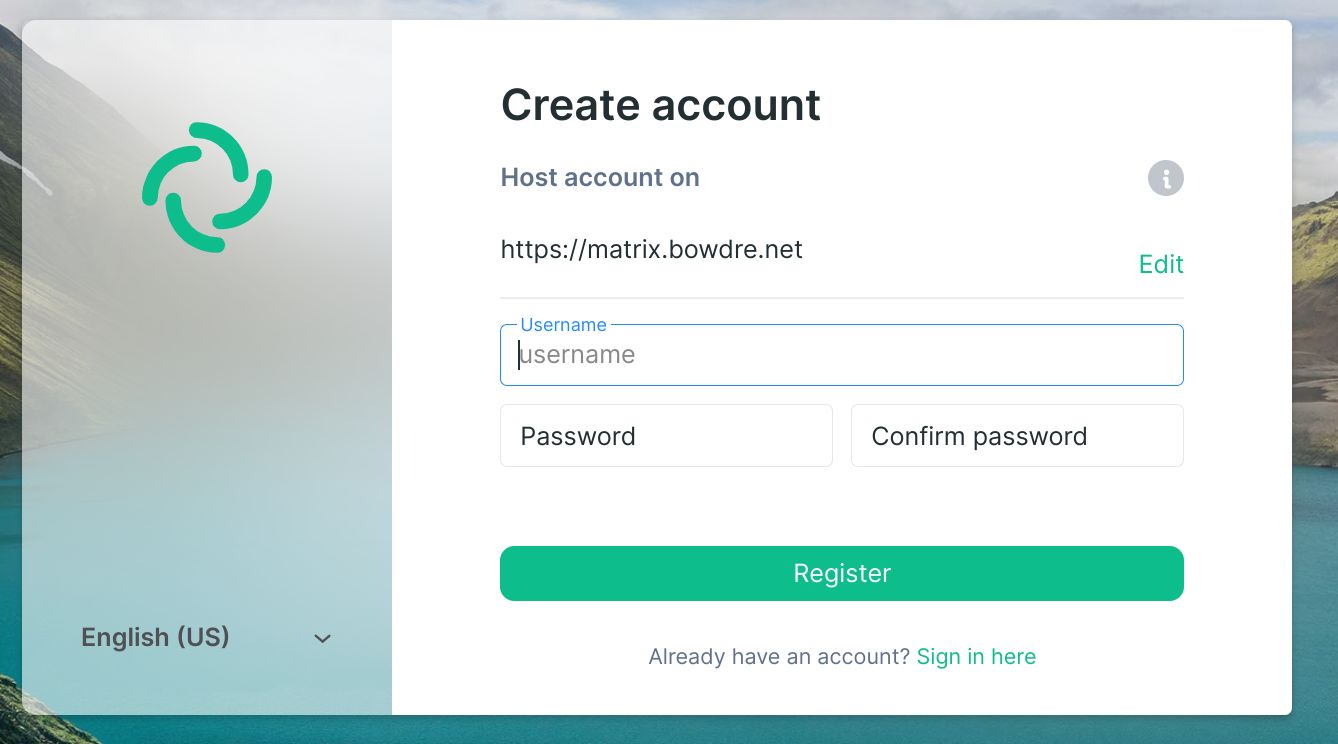
Now I can fire up my Matrix client of choice), specify my homeserver using its full FQDN, and register a new user account:
(Once my account gets created, I go back to edit /opt/matrix/synapse/data/homeserver.yaml again and set enable_registration: false, then fire a docker-compose restart command to restart the Synapse container.)
Wrap-up
And that's it! I now have my own Matrix server, and I can use my new account for secure chats with Matrix users on any other federated homeserver. It works really well for directly messaging other individuals, and also for participating in small group chats. The server does kind of fall on its face if I try to join a massively-populated (like 500+ users) room, but I'm not going to complain about that too much on a free-tier server.
All in, I'm pretty pleased with how this little project turned out, and I learned quite a bit along the way. I'm tremendously impressed by Caddy's power and simplicity, and I look forward to using it more in future projects.
Update: Updating
After a while, it's probably a good idea to update both the Ubntu server and the Synapse container running on it. Updating the server itself is as easy as:
sudo apt update # [tl! .cmd:1]
sudo apt upgrade
Here's what I do to update the container:
# Move to the working directory # [tl! .nocopy]
cd /opt/matrix/synapse # [tl! .cmd]
# Pull a new version of the synapse image # [tl! .nocopy]
docker-compose pull # [tl! .cmd]
# Stop the container # [tl! .nocopy]
docker-compose down # [tl! .cmd]
# Start it back up without the old version # [tl! .nocopy]
docker-compose up -d --remove-orphans # [tl! .cmd]
# Periodically remove the old docker images # [tl! .nocopy]
docker image prune # [tl! .cmd]